Crocheting is a wonderful and creative craft that allows you to create beautiful, handmade items. If you happen to be left-handed, you might be wondering how to crochet in a way that feels comfortable and natural for you. In this article, we will explore some tips and techniques specifically tailored for left-handed individuals, so that you can fully enjoy the art of crocheting without any frustrations or difficulties. So grab your crochet hook and let’s get started on this exciting left-handed crochet journey!
Materials needed
To begin your crochet journey as a left-handed crocheter, there are a few essential materials you will need. First and foremost, you will need a crochet hook. Be sure to choose a hook that feels comfortable in your hand and has a smooth surface. Additionally, you will need yarn, preferably in a color and texture that you find pleasing. Finally, gather a pair of scissors and a yarn needle for weaving in loose ends. Now that you have all your materials ready, let’s move on to holding the crochet hook.
Holding the crochet hook
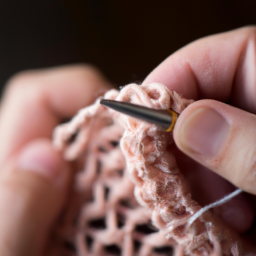
Holding the crochet hook correctly is essential for maintaining control and creating neat stitches. As a left-handed crocheter, you will hold the hook in your left hand. Begin by gripping the handle of the crochet hook between your thumb and index finger. Allow the hook portion to rest along the side of your hand, extending towards your pinky finger. Find a grip that feels comfortable for you and allows you to maneuver the hook with ease.
Understanding crochet terminology
Before diving into your first crochet project, it is crucial to familiarize yourself with the terminology and symbols used in crochet patterns. Learning these terms will enable you to follow instructions accurately and decipher the symbols used to represent different stitches. Start by learning the basic terms such as chain stitch, single crochet, double crochet, half double crochet, treble crochet, and slip stitch. Once you are comfortable with these terms, move on to identifying the symbols and abbreviations commonly used in crochet patterns.
Starting a crochet project
Now that you have a good grasp of crochet terminology, it’s time to start your first project as a left-handed crocheter. Choose a project that suits your skill level and interests, such as a simple scarf or a small accessory. Once you have chosen your project, select the appropriate yarn and hook size. The pattern or project instructions will usually indicate the recommended yarn weight and hook size. Once you have all the materials ready, create a slipknot to secure your yarn to the hook and prepare for the first stitches.
Basic crochet stitches for left-handed crocheters
As a left-handed crocheter, it is essential to familiarize yourself with the basic crochet stitches. Here are some commonly used stitches and their abbreviations:
Chain stitch (ch)
The chain stitch is the foundation of many crochet projects. To create a chain stitch, yarn over and pull the yarn through the loop on the hook. Repeat this process until you have the desired number of stitches.
Single crochet (sc)
The single crochet stitch creates a compact and sturdy fabric. To make a single crochet stitch, insert the hook into the designated stitch, yarn over, and pull through both loops on the hook.
Double crochet (dc)
The double crochet stitch produces a taller and more open fabric compared to the single crochet. To create a double crochet stitch, yarn over, insert the hook into the designated stitch, yarn over again, and pull through the first two loops on the hook. Yarn over once more and pull through the remaining two loops.
Half double crochet (hdc)
The half double crochet stitch is a versatile stitch that falls between the height of a single crochet and a double crochet. To make a half double crochet stitch, yarn over, insert the hook into the designated stitch, yarn over again, and pull through all three loops on the hook.
Treble crochet (tr)
The treble crochet stitch creates a looser and more open fabric than the previous stitches. Yarn over twice, insert the hook into the designated stitch, yarn over, and pull through the first two loops on the hook. Yarn over again and pull through the next two loops. Finally, yarn over once more and pull through the last two loops.
Slip stitch (sl st)
The slip stitch is primarily used for joining rounds or creating decorative effects. To make a slip stitch, insert the hook into the designated stitch, yarn over, and pull through both the stitch on the hook and the corresponding stitch.
Reading crochet patterns
As you progress in your crochet journey, you will encounter patterns that guide you through creating intricate designs. Learning how to read crochet patterns is essential to successfully tackle more complex projects. Begin by studying the pattern key, which will explain the symbols and abbreviations used in the pattern. Read the pattern instructions from right to left, following each step precisely. It may be helpful to highlight or mark completed rows as you progress through the pattern.
Common mistakes and how to avoid them
Crocheting, like any other craft, has its fair share of common mistakes. However, by being mindful and paying attention to certain details, you can easily avoid them.
Maintain consistent tension
One common mistake is inconsistent tension, which can result in uneven stitches and an overall messy appearance. To avoid this, make a conscious effort to maintain a consistent tension throughout your work. Practice controlling the tightness of your yarn by applying gentle, even pressure with your fingers as you crochet.
Avoid twisting your stitches
Another mistake that may arise is accidentally twisting your stitches. When starting a new row, ensure that your stitches are facing the correct direction and not twisted around the previous row. Twisted stitches can throw off the pattern and result in a distorted final product.
Count your stitches regularly
Counting your stitches regularly is crucial for maintaining the correct stitch count and ensuring your project turns out as intended. Take a moment to count your stitches at the end of each row or round. This simple habit can help you identify any mistakes early on and prevent them from compounding.
Troubleshooting tips
Even the most experienced crocheters encounter difficulties from time to time. Here are some troubleshooting tips to help you overcome common issues.
Fixing mistakes in your work
If you make a mistake in your crochet work, don’t panic. Most errors can be fixed without having to unravel the entire project. Carefully examine your work to identify the mistake, then use a crochet hook or yarn needle to carefully undo the stitches and correct the error. Patience and precision are key when fixing mistakes.
Resolving tension issues
If you find that your tension is consistently too tight or too loose, there are a few techniques you can try to correct it. For tight tension, try using a larger hook or consciously relaxing your grip on the yarn. For loose tension, use a smaller hook or hold the yarn more firmly. It may take some practice and experimentation to find the right balance for your personal tension.
Joining yarn or changing colors
In some crochet projects, you may need to join a new yarn or change colors. Here are some techniques for seamlessly incorporating new yarn into your work.
Securely join a new yarn
To join a new yarn, start by completing the last stitch with the old yarn, leaving a long tail. Then, take the new yarn and create a slipknot. Insert the hook into the designated stitch, hold the tail of the new yarn against the hook, and pull it through the stitch. Continue crocheting with the new yarn, ensuring that you leave a long enough tail to weave in later.
Change colors seamlessly
To change colors in your work, complete the last stitch of the old color, leaving a long tail as before. Grab the new color of yarn and create a slipknot. Insert the hook into the designated stitch, hold the tail of the new color against the hook, and pull it through the stitch. Carry the unused color along the back of the work, making sure to crochet over it as you go. This will ensure that your color changes are seamless and neat.
Finishing and blocking your crochet project
Once you have completed your crochet project, it’s time to give it a polished and professional finish. Follow these steps to achieve a finished look for your work.
Weave in loose ends
Using a yarn needle, carefully thread the loose ends of yarn through the stitches of your project. Weave the ends in and out multiple times to secure them in place. Trim any excess yarn, being careful not to cut through your stitches. By weaving in the loose ends, you create a clean and tidy appearance for your crochet project.
Block your finished project for a professional look
Blocking is the process of shaping and straightening your crochet work to give it a more professional and polished appearance. Fill a basin with tepid water and submerge your crochet project. Gently squeeze out the excess water, being careful not to wring or twist the fabric. Lay the project on a clean towel and shape it according to the desired dimensions. Allow it to air dry completely before removing the pins or weights used to hold the shape. Blocking will help your project maintain its form and enhance the overall look of your work.
Now that you have learned the basics of crocheting left-handed, you are well-equipped to embark on a wide range of crochet projects. With practice and patience, you will continue to develop your skills and create beautiful handmade items. So grab your crochet hook, choose a project, and let your creativity flow. Happy crocheting!